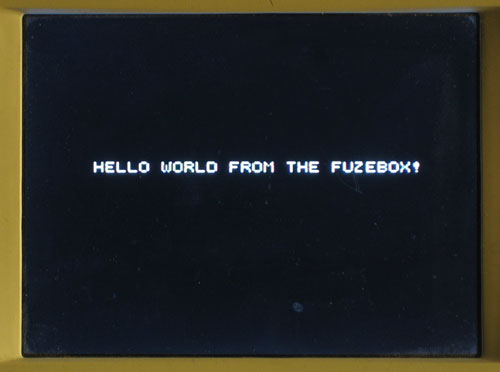
Now that you have successfully uploaded a .hex file, its time to make your own demo. We will start with the programmer's classic, "Hello World". This program is the simplest possible, it just prints out "Hello World" on the screen, but it is the foundation for all games!
Luckily, you won't have to start from scratch and write a video or sound engine! All games and demos are based off of the firmware kernel/core which does all the tough work in the background. Start off by downloading the most recent core release and uncompressing it into a folder where you will do all your game-work.
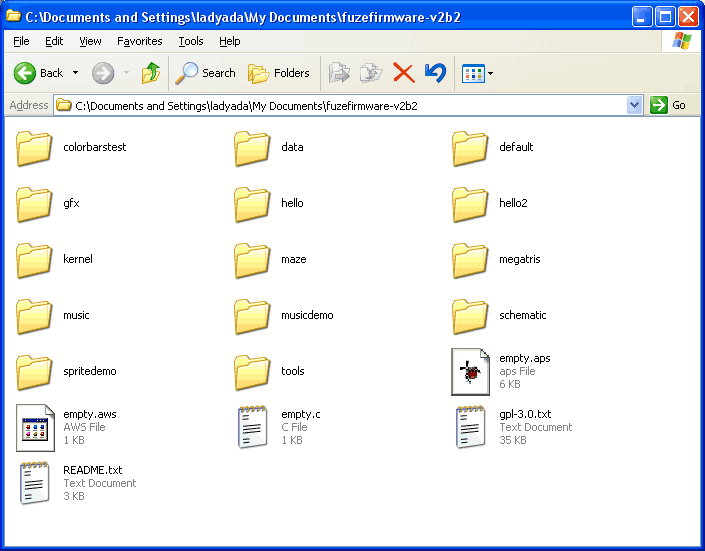
The folder should look something like this. There will be folders named kernel and tools and schematicwhich contain code, software and documentation. There are also some game project folders, like hello which is the hello world demo. Open up hello
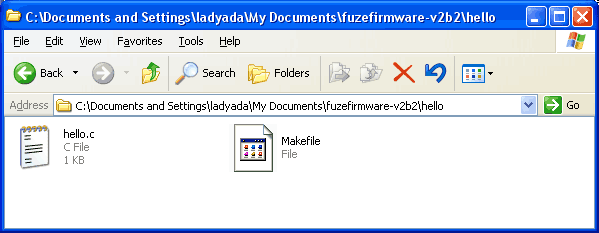
There are two files in there, both are text files. One is the Makefile, each project has a Makefile which details information that the compiler uses to create the game binary. There is also a hello.c file that has all of the game code. Note that its not a very big file, because most of the work is done in code that is stored back in the kernel folder.
First, lets look at the Makefile, which is a bit unpleasant so we might as well get it over with:
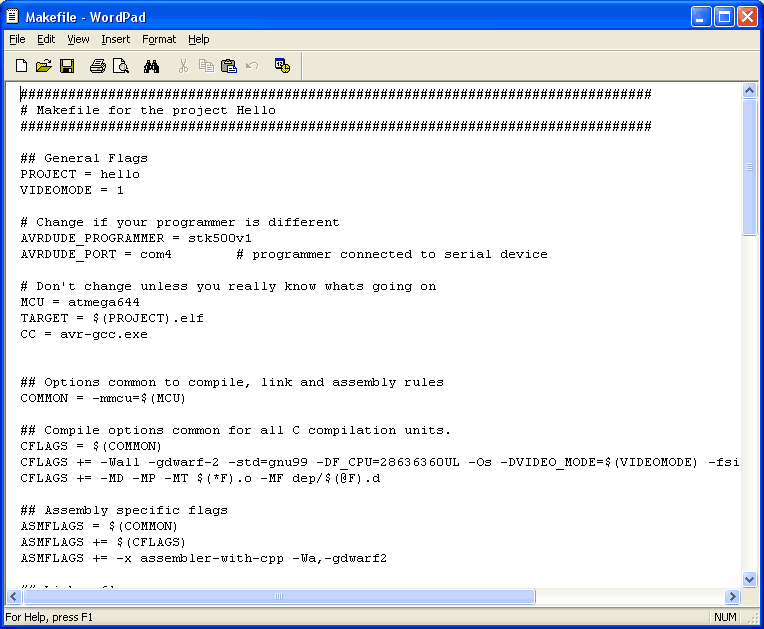
The hello world makefile is basically a huge list of VARIABLES (which tend to be in capital letters) and their values, which appear after the = sign. The four most important flags are at the top.
- PROJECT: First off each project needs a name, such as this one, hello. Note that the project name must match the name of the .c file in the project folder. Don't change this since we want to keep the name.
- VIDEOMODE: We'll cover this in detail later, suffice to say, the video mode tells the kernel what sort of graphics engine we want to use. mode 1 is tiles only, and mode 2 is tiles + sprites. Don't change this either.
- AVRDUDE_PROGRAMMER: this is the programmer you used in the avrdude command line. If you have an FTDI cable, use stk500v1, if you're using a usbtinyisp, put down usbtiny, etc.
- AVRDUDE_PORT: this is how to talk to the programmer listed previously. Popular options are usb, COM1, /dev/ttyS0, LPT1, etc. Make sure to edit this if your COM port is different!
Once you have modified the Makefile (if necessary), save and close it. Now open up your handy terminal or command line and cd to the hello world demo directory and run the command make to run the make program that uses the Makefile to compile the hello world demo.
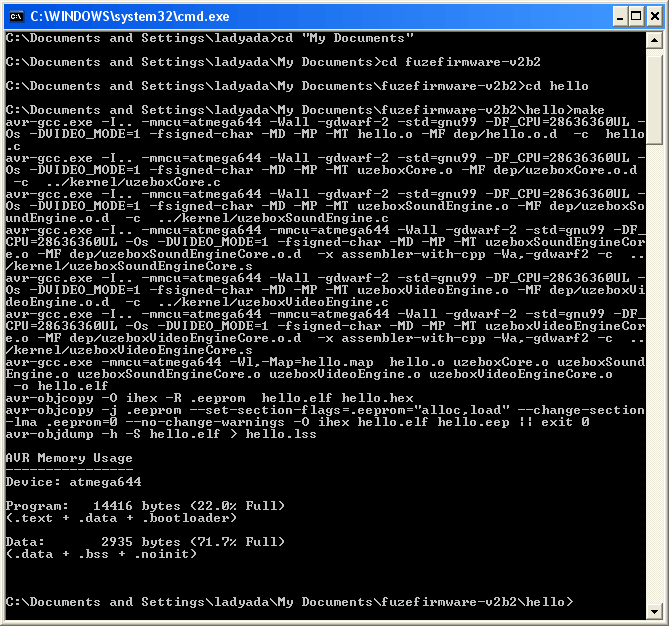
There's a lot of gibberish that will scroll past the screen. If you look carefully you can see the hello.c file being compiled along with the uzeboxCore, uzeboxSoundEngineCore and uzeboxVideoEngineCore that comprise the kernel.
If the compile goes as expected (which it ought to) you will see a memory usage overview. You only need to pay attention to the first number, which indicates that here we have used only 22% of the available program storage. If this starts to hit 90%, its time to think about whether your game is too big, but that's unlikely to happen for a long time.
Next, run make program which will send the firmware over to the console
Now check out your screen, you should see this message!
Congrats, you have compiled & uploaded your first game...another big milestone
Now that you have compiled and uploaded the hello world example, the next step is to modify it to say something else. It's not too hard. First step is to open up the hello.c file in a text editor. You can use a specialty programming editor such as Programmers Notepad or XCode, whichever makes you happiest!
#include <stdbool.h>
#include <avr/io.h>
#include <stdlib.h>
#include <avr/pgmspace.h>
#include "kernel/uzebox.h"
#include "data/fonts.pic.inc"

const char strHello[] PROGMEM = "HELLO WORLD FROM THE FUZEBOX!";

int main(){
   SetFontTable(fonts);
   ClearVram();
   Print(7,12,strHello);

   while(1);

}
The first few lines are includes, files that the compiler needs to refer to when compiling this example. Most of them are pretty standard for AVR programming, and for the most part you should just ignore them. One of the files included is called "fonts.pic.inc" which is the file with the font table, which defines what the text on the screen looks like.
The first line that is really interesting is this one:
const char strHello[] PROGMEM = "HELLO WORLD FROM THE FUZEBOX!";
In general, variables are stored in the dynamic memory/RAM because they vary a lot, being assigned and reassigned new values. However, note that there's only 2K of RAM as opposed to 64K of flash. Because display strings are constant (they aren't modified in any way, just displayed), we can store them in the flash memory instead of RAM, to do so the keyword const is placed before the string creation and the keyword PROGMEM is placed right after the variable name, to indicate that this variable is stored in flash (program memory). The message to be displayed follows.
int main(){
   SetFontTable(fonts);
   ClearVram();
   Print(7,12,strHello);

   while(1);

}
Next is the main program which runs when the fuzebox boots up. The first line is pretty clear, it creates a font table which allows us to refer to the predefined font tiles when we print out the message. The second line clears out the screen, making sure there's no junk left over from the booting up process.
The third line is where the magic happens. The Print(x, y, string) function is defined in the kernel and allows us to easily display a constant string at a given location. Note that the location is not indicated in pixels but rather in terms of tiles and there are 40 x 28 tiles (which will be discussed later)
The final line is simply a busy-wait/halt loop, where we do nothing. If there was some sort of game interface or logic, it would probably go here but this demo only displays a string.
OK now it is time for you to experiement with Hello World.
Try:
- Changing the message to say something else
- Moving the location of the message to a different part of the screen
- Adding another line of text
After each modification, recompile and upload your new demo to the Fuzebox to see it work. If you have problems just go back to the original hello.c file and see what typos or mistakes you may have made
