|
|
|
MiniPOV2
Make |
history
last edited:March 22, 2005
September 1, 2007
|
|
Hooray! You have a kit! Here's how to make it into
something nifty.
|
|
|
|
|
|
There are a few tools that are required for assembly.
None of these tools are included. If you don't have them, now would
be a good time to borrow or purchase them. They are very very handy
whenever assembling/fixing/modifying electronic devices! I provide
links to buy them, but of course, you should get them whereever
is most convenient/inexpensive. Many of these parts are available
in a place like Radio Shack or other (higher quality) DIY electronics
stores.
|
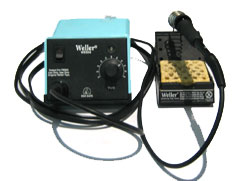
Soldering iron. Personally, I like the WES50
(now the WES51)
and the other ~$100 Wellers.
One with temperature control and a stand is best. A conical
or small 'screwdriver' tip is good, almost all irons come with
one of these. A low quality (ahem, $15 radioshack) iron may
cause more problems than its worth. YMMV. |
Buy
a WES51 from Allspec |
|
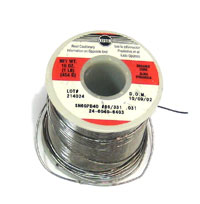
Solder. Rosin core, 60/40. Good solder is
a good thing. Bad solder leads to bridging and cold solder joints
which can be tough to find. Dont buy a tiny amount, you'll run
out when you least expect it. 1lb spools are a minimum. |
Buy
1lb spool from All Electronics |
|
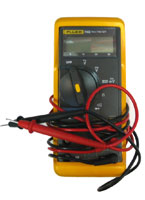
Multimeter/Oscilloscope A meter is helpful
to check voltages and continuity. |
(Anyone have a good suggestion for an inexpensive meter?) |
|
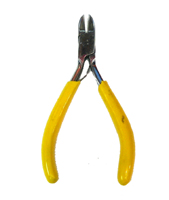
Flush/diagonal cutters. Essential for cutting
leads close to the PCB. |
Buy
flush cutters from All Electronics |
|
Desoldering tool. If you are prone to incorrectly
soldering parts. |
Buy
a solder sucker from AllElectronics |
|
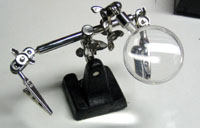
'Handy Hands' with Magnifying Glass. Not
absolutely necessary but will make things go much much
faster. |
Buy
a handy tool from All Electronics |
| |
Good light. More important than you think. |
|
|
|
|
|
|
|
Check to make sure your kit contains the following:
| Picture |
Name |
Description |
Quantity |
|
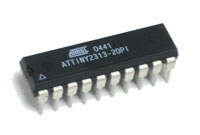
IC1 |
ATtiny2313 Microcontroller |
1 |
|
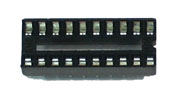
IC1* |
20 Pin Socket |
1 |
|
R10 |
1/4W 5% 10K resistor |
1 |
|
R1-9, R20-22 |
1/4W 5% 47 ohm resistors |
11 |
|
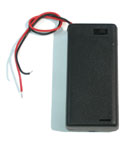
U1 |
2 AA Battery Case with switch |
1 |
 |
D1-8 |
Red oval LED |
8 |
|
X1 |
DB-25 male connector w/solder cup connectors |
1 |
| |
PCB |
Silkscreened PCB |
1 |
|
|
|
|
|
|
Learn how to solder with tons of tutorials!
Don't forget to learn how to use your multimeter too!
 |
Get yer soldering iron heated up to ~700deg C.
Put the circuit board into the handy tool. You're ready to go! |
 |
The first part to solder is the parallel port
plug. It slips onto the edge of the board. Make sure its snug
against the edge of the board, not crooked, as the plug will
be strained otherwise. Also make sure its lined up right with
the pads. |


|
Heat a pad with with the iron for a few seconds,
then dip the solder between the pad and socket-pin to solder
them together.
Repeat for all 25 pads.
X-pert bonus: If you are sure you'll want to take the DB-25 off sometime later (to make it lighter or smaller or something), only solder the pins that go to the chip (check the schematic or look at the traces on the PCB)...that'll make it easier to desolder later. If you have more than one kit, or an Atmel programmer, you don't need the DB-25 since its only for reprogramming the chip.
Super X-pert bonus: If you don't even want to have to desolder the few pins for the DB-25 you can try 'press-fitting' the DB-25 onto the PCB and programming it like that. When you're done programming, just slip it off.
|
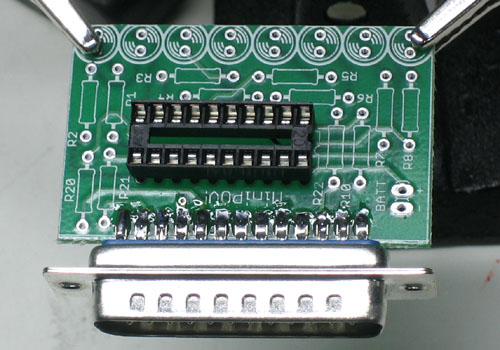 |
Next is the PCB socket. Make sure the socket
matches the picture: theres a little notch at one end that matches
the picture. |
|
Press the socket into the PCB with a finger while
soldering two corner pins |
|
Next is the 10K resistor. Bend the leads near
the resistor, and slip them through the holes in the board,
while holding the resistor next to the PCB, bend the leads on
the other side so it stays in place. |
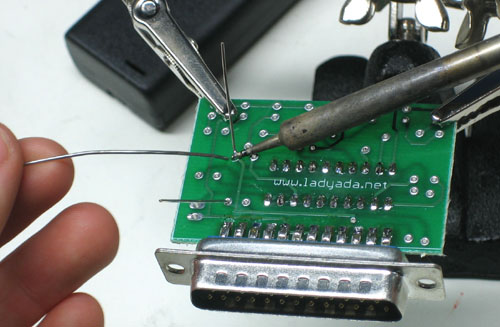

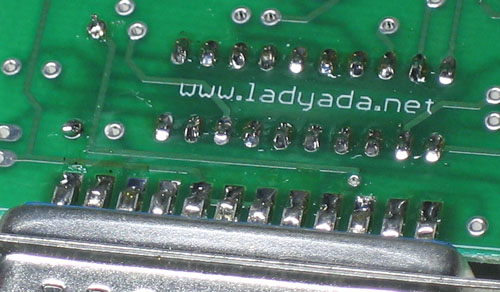
|
Solder it in and then clip the leads near the
board. |


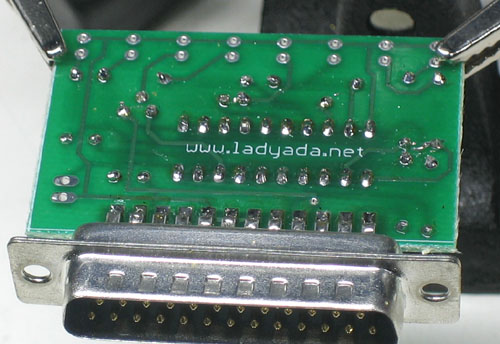
|
Next is the 47 ohm resistors. Repeat the above. |

|
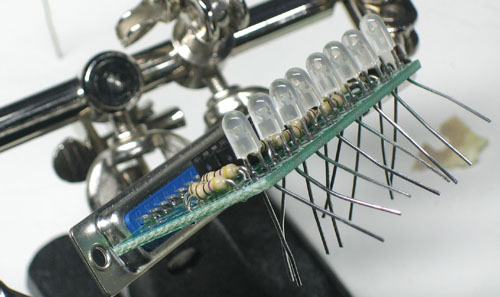
Now solder in the LEDs. LEDs are polar, and if
they are placed backwards they dont work. If you look carefully
you'll note that one leg of the LED is slightly longer than
the other (positive). You can also look into the LED and see
the triangular 'cup' (negative). Make sure the negative side
is flush with the edge of the PCB.
|
 |
Next the battery pack. The red wire connects
to the pin marked with a +. The black wire connects to the pin
marked with a -. |
 |
Insert the microcontroller into the socket. Note
that the chip has a little notch at the end, which should match
the picture (which should match the socket). Don't put it in
backwards, the chip can be permanently damaged this way. |
Put 2 AA batteries into the holder and turn it
on. The microcontroller is pre-programmed to blink each LED in order.
If one of the LEDs doesn't turn on or off, check the soldering connections
and make sure its not in backwards (you'll have to desolder it).
If -none- of the LEDs turn on, use the multimeter to verify that
there is 3VDC between the red and black wire on the battery pack,
and that the microcontroller is in right also heck to make sure
that the LEDs aren't flipped.
Tip #1 If you bought a kit, the LEDs are oval which means they can be placed closer to each other. This will make the image smaller but can improve short-range visibility. I bent these after soldering them, so they're a bit crooked. If you shape the LEDs before soldering you can probably get tighter spacing.

|
|
|
|
|
|
Now that
its assembled, you can reprogram the chip with persistance of vision
code, to display custom messages & images. To program the chip
you will need a computer with a parallel port (basically, any PC).
If you're running Windows:
- Download the
latest WinAVR package from sourceforge
- Install the software
- Download the zip of example source
code
- Uncompress it somewhere convenient
- Check to make sure WinAVR installed properly: open a command
window and cd
to the directory where you expanded the source code files. Run
make all.
There should be a lot of gibberish, not something like 'make'
is not recognized <etc>
- Run dir
and verify that there is a file called minipov.hex
- Plug in the MiniPOV into the parallel port, and turn on the
battery pack(it must be powered to be programmed even if its looking
like its powered off of the parallel port)
- Run make program-minipov,
this will start the programming procedure. If you get errors such
as avrdude: can't
open device 'giveio' or avrdude:
failed to open parallel port then you'll need
to grant yourself parallel-port permissions. Do this by running
install_giveio.bat,
which is in C:\WinAVR\bin\,
this will give you permission to access the parallel port. You
only have to do this once. Try running make
program-minipov again!
You can also program the hex
files using avrdude-gui.exe, which is installed
with WinAVR:
- Under the -p Device menu, select ATtiny2313
- Under the -c Programmer menu, select DT006
- Under the -P Port menu, select LPT1
(unless you happen to have multiple printer ports)
- Under the Flash section, click Write
and Verify. For the file, click ...,
look in the directory where you previously typed make,
and find the hex file you want to program
- Click Execute!
If you're running Linux (or another unix-like
OS): (from Steve
Lacy's page)
- Install the latest versions of flex, bison, byacc, gcc and gcc-c++
for your distribution using whatever tools are appropriate (emerge,
apt-get, rpmfind, etc.)
-
Download the latest binutils
source distribution and compile it using:
# ./configure
--target=avr --program-prefix="avr-"
# make
# make install
-
Download the latest gcc
source distribution and compile it using:
# ./configure
--target=avr --program-prefix="avr-" --enable-languages=c
# make
# make install
- Download the zip of example source code
- Download the latest avr-libc
distribution and install it:
# ./doconf
# ./domake
# ./domake install
- Your avr-gcc environment is ready to go. A lot of stuff is under
/usr/local/avr.
- Install avrdude
- Download the zip of example source
code
- Uncompress and cd
into the source directory.
- Run make
and verify that avr-gcc was found and everything compiled all
happy (there should be a bunch of .hex files now)
- Plug in the MiniPOV into the parallel port, and turn on the
battery pack (it must be powered to be programmed even if its
looking like its powered off of the parallel port)
- Run make program-minipov,
this will start the programming procedure. You may have to edit
the Makefile and change the parallel port from 'lpt1' to whatever
is appropriate for your distribution (i.e.
/dev/ttyP0)
Note: if you are trying this out with a new microcontroller (i.e. not from a kit) you'll need to burn the fuses first, otherwise it won't work right and might not be programmable. Run make burn-fuse while the minipov is powered and connected to the parallel port.
Note 2: When plugged into the parallel port, the LEDs may light up oddly or dimly, this is normal.
|
|
|
|
|
|
Now its time to put a custom image into the POV
toy. Using your favorite text editor, open up the file mypov.c
in the downloaded firmware directory.
Near the top of the file is a table called image[].
Each entry in the table is an 8 bit number (which is displayed in
binary: B8(00000000)
through B8(11111111).
The 'B8()' just indicates to the compiler its in binary not in decimal).
When the microcontroller starts up, it basically goes through the
table and uses the value to determine whether each LED is on or
off. For example, if the value is 01010101,
then all the odd LEDs are on. If the value is 00000011,
then the bottom 2 LEDs are on. After drawing the desired design
on graph paper, go through each line and edit image[],
adding or removing lines to make the table the right length. The
table can be more than 500 lines long. (Hint: the easiest way I've
found to do this is to copy enough 'B8(00000000),'
lines to fit the size of your design, then enter in the 1's in insert/overwrite
mode, which almost all text editors have) Now count how many lines
you've got and put that number into the variable imagesize
(which is defined right below the image[]
array)
Compile mypov.c by opening a command
window, going to the directory and typing in del mypov.hex (or rm mypov.hex) and then make mypov.hex. This should create
a new mypov.hex which you can upload to the MiniPOV (by typing make program-mypov)
|
|
|
|
|
|
